Monday, September 9, 2013

Farmhouse Chic!

My dad has come through for me once again! He is the greatest antique picker! I have been in need of a lampshade for a vintage glass lamp base that I've had for over a year!!! I have searched all the chain retail stores with no luck due to the fact that they are soooooo expensive! $15 and up for something that just sits on top of a light?! No thanks!

The solution: ask my dad to hunt down a unique frame that I can recover and he came through with a square scalloped bell frame shade. 

Once I removed the existing fabric and placed it on the base, I decided that I really loved the industrial look of the metal and didn't want to completely cover the frame. Burlap was the fabric touch this project needed to make it industrial farm chic! Lol

Materials
Lamp shade frame
Burlap ribbon
Jewelry wire
Jewelry tools 
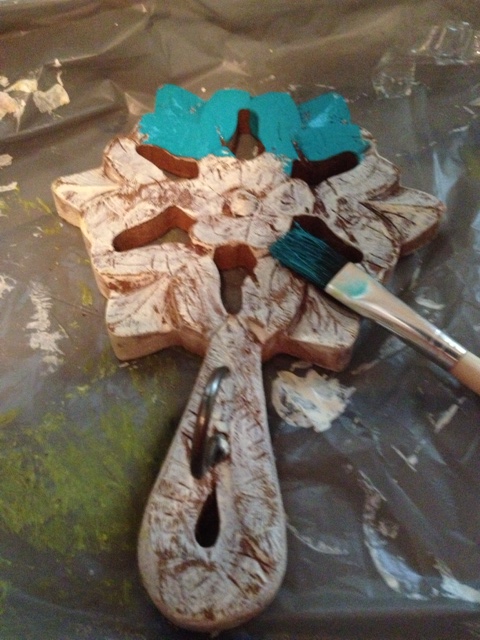
Step 1: remove any glue or fabric residue from the frame with sand paper. (This took quite a while.)
Step 2: measure out and cut ribbon in to strips
Step 3: assembly requires making wire loops, looping them through the ribbon, and then clamping them. So no sewing or glue required!

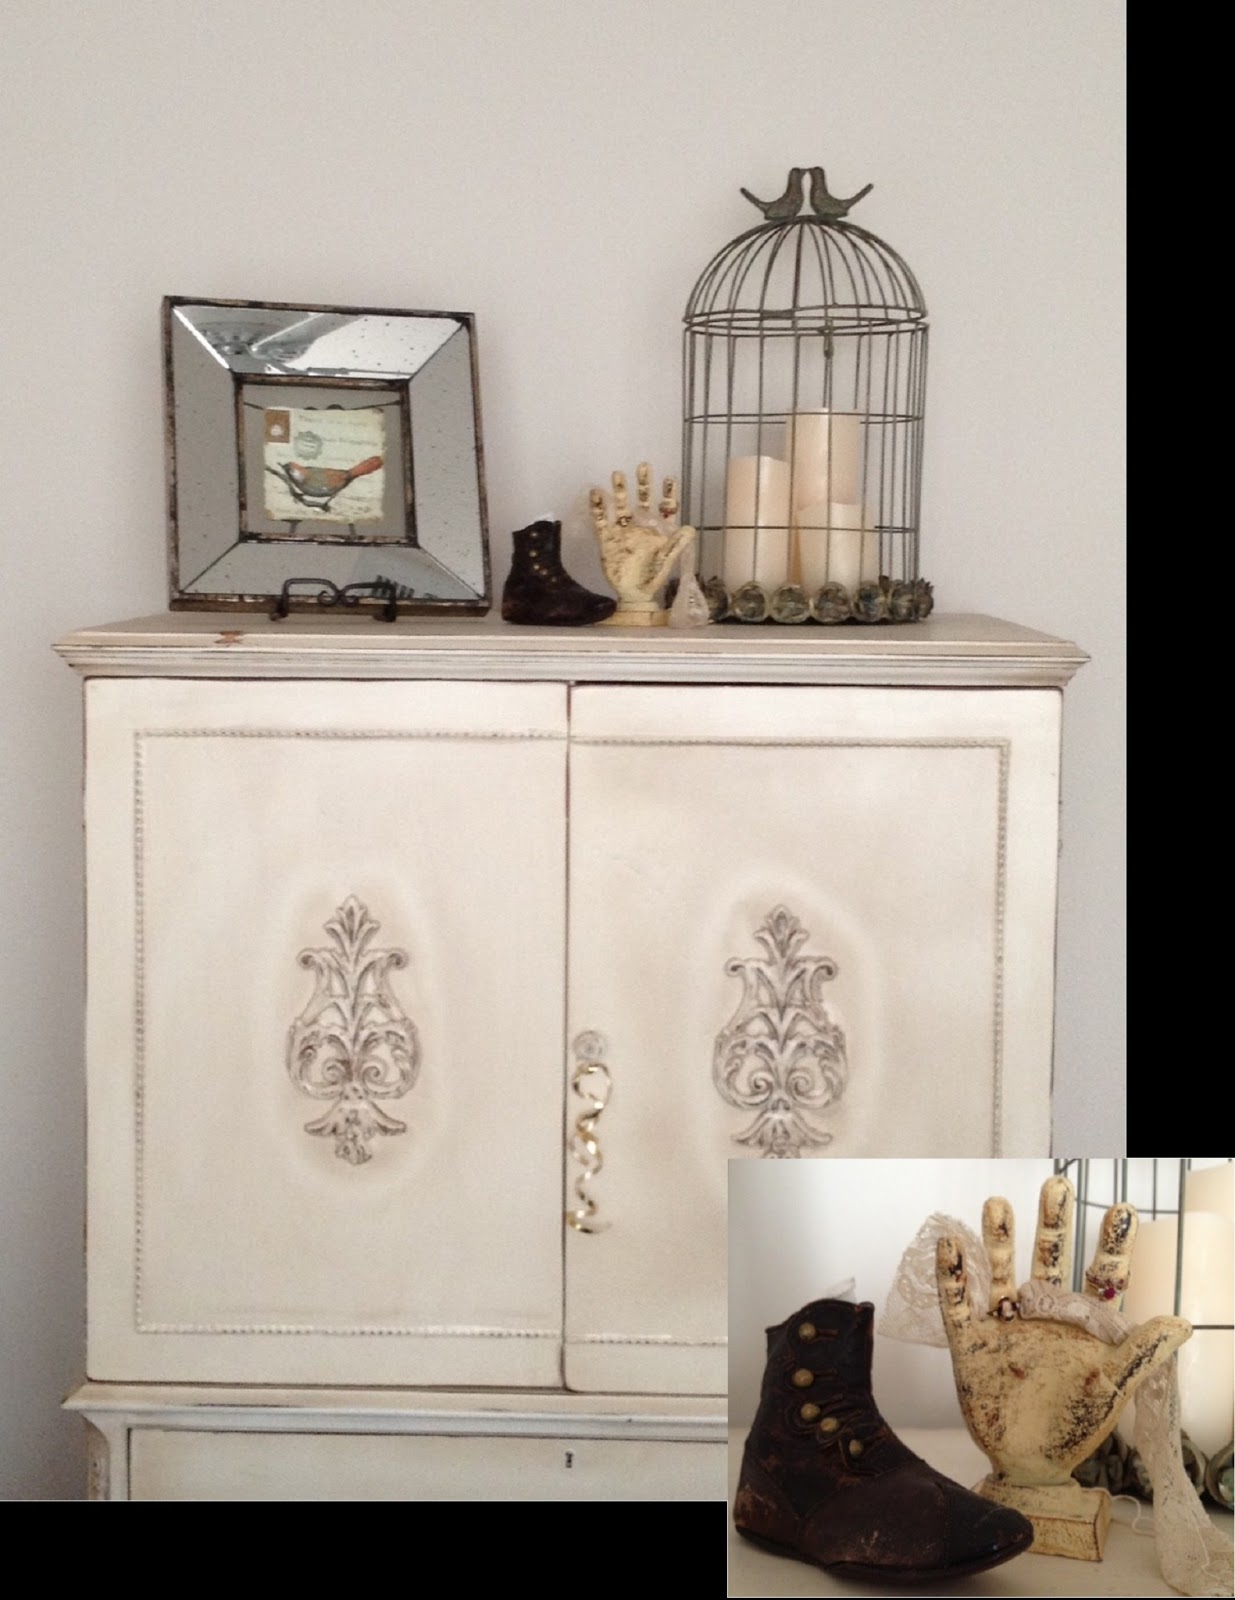
Here is the finished project! I love that it is understated! It fits right in to the other small items on the table. It seems that I am obsessed with grouping items together in threes. The candy bowl and vase a both Vintage Jadite pieces ( one of my best antique purchases!) 


Antiquing is more about being in the right place at the right time rather than knowing what you are looking for. My purchase of 70 Jadite pieces for just over a $100 is proof. As any Jadite goes for $20 dollars and up for 1 piece. This is crazy to me! 


Sunday, August 18, 2013

I'm Hooked!

I have just completed move #2 after living with my parents and am finally getting to some projects that are just not feasible in a one bedroom apartment with dogs who like to get into everything! I now have my very own CRAFT ROOM!!! It even comes with a reading nook!  Here are some pictures of the layout:

My first project was pretty simple. For some time, I have had these plain wooden key hooks made from trivets that have needed to be spruced up a bit. I chose to "white wash" them with three coordinating colors. This can be done within one 30-45 minute craft session....SO SIMPLE!!

Step 1: Paint an uneven base coat of white, leaving some bare wood showing through. This will allow the details of the design show through the layers of paint.
Step 2: Add water to your your paint (60% paint and 40% water). You want to thin it out so that it wipes off easier and allows the white to show through. 
Step 3: "White wash" the wood and wipe off with a damp paper towel or cloth. Make sure and leave most of the color in the grooves, showing the design. 
Step 4: Add felt to the back of the wooden hooks to prevent paint damage when hanging on the wall. (I learned this lesson when living in the apartment!) 
Step 5: Time to hang them on the wall. I used medium-long nails. (you may have to drill a nail hole if the design does not have hole that is centrally located.)

Total cost: $ 8.00 ( for acrylic paint and metal hooks, wooden trivets were FREE!!) 
I staggered mine to allow room for my dog leashes to hang straight rather than bunching on the the ground. I love how they turned out and am ready to tackle my next project... a refurbished lamp shade.


Sunday, June 2, 2013

Spare Parts and the Chandelier Man

Never underestimate the power of stuff you have just laying around. I usually end up with leftovers from various craft projects and usually am stumped as to what to do with them next or how to store 1 or 2 random items; however, my dad is the king of spare parts!

His antiquing business has morphed from furniture to fishing lures to toy trains to chandeliers to upcycling and salvaging architectural items. Now, his booths hold a hodgepodge of items, but he is most famously know for his chandeliers and crystals, giving him the name "The Chandelier Man." On sight, you would not expect him to have this creative mind that turns metal odds and ends into sparkling beacons that women flock too, but this is the case! He just has a good eye and pays attention to trends. He also has a knack for finding road side deals. Some of his most current projects are technicolor furniture and architectural details. They are pretty awesome!

Memorial weekend my goal was to get 2 projects done. The first was featured in my "I've been Framed!" post and the second was turning a vintage wooden sewing spool into a bracelet holder. I had a simple vision in mind for this transformation, however, my dad's was better, of course. With a little advice from  him and some gifted spare parts, I ended up with the creme de la creme of bracelet holders. So, bare with me! This is a pretty long post because of the pictures and happy mistakes.

Materials:
Chandelier finnial
washer
vintage wooden spool
old lamp base
metal dowel with rivets
spray paint
paint samples
 antiquing glaze
sponge brush
cloth sponge
1. ASSEMBLY

2. SPRAY ON LIGHT BASE COAT               3. SPRAY ON WHITE TOP COAT
***optional step***


4. "Whitewash" the whole stand, using a paint sample of your choice. The mixture should be mixed 50/50 with water. Apply liberally in small sections. Next, wipe off the water/paint mixture using the cloth sponge, leaving whitewash in the grooves. This will bring out the details of the design of the lamp base and groves at the base of the spool (best to wipe vertically on the spool base).
5. Antiquing the stand. Follow the same process as above, using the sponge brush and the cloth sponge. The sponge brush should be damp for the best application.
 6.  Sanding edges of designs, riveting, and body of the spool. This will help the details standout as well as let the green come through. (***This may also be optional.***)

                   
START        TO 

FINISH


Different design options include: 
- wooden dowels inserted in the holes to hang bracelets
-a vintage glass/crystal doorknob as the top embellishment
- a wooden or more modern lamp base

And here it is on display.....


Monday, May 27, 2013

I've Been Framed!!!

The newest trend in the trash-to-treasure world seems to be oversized vintage, reclaimed, or even new ornate frames painted in colorful hues. The only catch to these gems is that now they are going for about $25 - $50 without the glass or backing. For this reason, I generally pass them up when I'm in a antique store and head to my local Goodwill or thrift shop. Garage sells are great places to spot them too!

I happened by this frame on an impulse stop on a lazy Saturday. The thrift store I found this fram in just happens to be less than a mile from my apartment! I purchased this vintage four layered bead board   frame for $15, giving me room to buy supplies for upcycling. The frame was heavily painted with a beige color and just looked too perfect. I felt I needed to rough it up a bit!!

 Materials:
sand paper
painters tape
sponge brush
cloth sponge
antiquing glaze  
1. Sand the bead board sections and the edges of the ornamentation of the other frame sections, bringing out the detailing.
2. Tape off the ornamentation.
 3. Dampen the sponge brush. This will help thin out the glaze as you apply it to the bead board 1 side at a time. (This allows you to wipe off excess before it drys.)
 4. Grab the cloth sponge and wipe off antique glaze leaving some in the groves, enhancing the detail. (This makes the designs pop even from afar!)
5. Remove the tape and you are finished.


Time for this project was about 30 minutes. I love the roughed up look and "imperfections" that were brought out by the sanding and antiquing glaze. Under the beige paint, there was a white plaster, which I didn't like the look of as I was sanding.(Fresh white is so not in! Well at least not in my magzine!) The glaze made it look like old wood and I was sold!!! You can see it in the top left corner. The frame also ended up having a great contrast between the layers.
For now, this project is labeled "to be continued." I'm not sure exactly what it's purpose will be: a picture frame, shadow box, bulletin board, chalkboard, cuckoo clock display, or home to another vintage find. So, stay tuned!!!

Sunday, May 12, 2013

Dress It Up!!

Sometimes antiquing and shopping is about looking toward the future. What will it look like in this room or in that light? Is this necklace going to really go with multiple items? Then again sometimes its about finding inspiration for repurposing.

While some may love to by an item that is perfect on purchase, I often look for the items that can be morphed by some paint or dressed up a little to fit a new purpose. My newest find, a birdcage cardholder, was made to look old and as always Shabby Chic. Birds and birdcages seem to be the newest trend, so you should be able to find a similar item almost anywhere. Maybe even a vintage birdcage!!


For this item, I had a jewelry organizer in mind. The three hooks at the bottom are perfect for long necklaces that wont fit in my jewelry box. The height and number of horizontal bars created great hanging space for hook earrings as well as space to clip hair accessories. Of course, I'm a bit of a jewelry collector, so I needed a bit more store-to-display space. 

My project: Play dress up!


Materials:
 rustic twine
green embroidery thread
canvas pennants
bird themed scrapbooking pack
standard hole punch and small circle punch


Step 1: Pennants 

1. Cut embroidery string about 18 inches or as fits your frame/display.
2. Tie one side of and string pennants, leaving about an inch between each. (I threaded from the  bottom up.)
3. Tie off other end and then tie off places in the middle of the string of pennants to secure them as earrings will add weight causing them to shift. (I spaced the tie-offs evenly.)
4. Choose simple post earrings to display on the pennants. These work best as they carry little  weight. (Be careful as you poke the holes. You don't want to bend the post of the earring.)


Step 2: Hanging tags and other baubles 
1. Grab the rustic twine and create simple loops by folding the length in half, knotting the free ends. These will be used to hang pendants, hair clips, and earring tags.
2. Hannging is simple. Pull the loops through punched holes or rings of pendants. Wrap around a  horizontal bar and pull until the knot catches in the looped end. 

For tagged hanging, there is only the added step of hole punching or clipping with the shabby chic clips. (These came with the display! 

This project only took me about 45 minutes to 1 hour. Total cost of add-ons ~ $10.00 and I had plenty left over for future projects! I love how it turned out!! It's a jewelry scrapbook!!! 
    

Another bird inspiration piece came in the form of an earring holder. The shape of it made it difficult to clip and un-clip earrings, so when I moved I re-purposed it as a broach holder/display. It took the place of a dress form borrowed from my parents.
I love displaying in a functional and unique way. I hope you feel inspired! Coming soon....more bird inspired projects! 


Monday, May 6, 2013

Box of Blooms

Although I have lived in my apartment for 9 months now, I am still finding little projects to unpack, reorganize, and store for display. My recent inspiration came from a weekend reorganization mission. I uncovered a simple tin box in my storage trunk/coffee table. I love multipurpose items!!

It must have been gifted to me during my move. My dad would just throw things in there he thought i would like and turns out its perfect for the headbands I've been meaning to store as display. Why hide what's meant to be an ornament anyway!?!


The curved top prevents the flowers and feathers from getting squished and the dimensions allowed me to organize them in a way, which makes it look like a planter box. (Well maybe its a little overstuffed :) )


It is already on display in my bedroom. I'm not quite sure if this will be its permanent home but for now it works and is practical. I use this old medical stand as my everyday jewelry stand....projects to come are sitting on top (hint: more store to display made from a sewing bauble). Other items featured on the stand include:
      -an old metal "K" tucked in the basket below
      -vintage stand-up mirror (a $2 goodwill find)
      -my next project!!


I hope you enjoyed!! Come back soon!!


Friday, February 15, 2013

MAIN STREET

This week I went to a conference in Grapevine, Texas, which is approximately 30 minutes outside of Dallas. I loved it! Our hotel was conveniently located 2 minutes away from a new but old Main Street. On either side, my eyes beheld boutiques, resale shops, vintage/antique markets, and local eateries.

Leave it to me to go on a trip to a metropolitan region and come back with vintage finds. The original plan was to simply park and walk to Farina's Winery & Cafe (= awesome! Half price pizza during happy hour!!!); however, we were distracted by the dazzling glitter of trinkets and treasures from the corner store. Of course, we had to be "flexible" as our conference suggested and stop in. I meandered around the store filled with western wear, resale fashions, and antique trinkets....when all of the sudden I stumble onto a shining beacon of whites, creams, and pastels. BEHOLD the shabby chic booth!!!

My eyes don't know where to look and I immediately know I will not leave the store without at least one item. Turns out, I left with two. :)

Number 1: old iron hand in all its cream & rusty glory wrapped with lace ribbon
My vision: ring holder for my dresser and companion for my vintage child's shoe


Number 2: a pleasantly rusted three tiered basket tower
My vision: a caddy for all my towels, perfumes, lotions, and bathroom odds and ends


As ever, signing off as a satisfied customer!


Sunday, February 10, 2013

Indiana says "Howdy!"

Last summer, one of my closest friends said, "I do," to a Texas boy named Craig. Her story is quite unique. She moved from Indiana to Texas for graduate school and met him on her very first visit to Beaumont, Texas. The rest is history. I was truly blessed and very excited to help her in both planning and enjoying her wedding day. 


It all started with a very long trip to the fabric store (a place where I could get lost)! We were on a mission to get an eclectic mix of colorful and patterned fabric to make pennants and other accessories. They probably hated us!! We left piles of fabric in our wake, but in the end we decided on patterns that included yellow, charcoal gray, navy blue, and splashes of coral. It was the start to a country chic wedding that we would transport to Indiana. With the help of several craft websites (i think you know which ones I'm talking about) and a little auction in Crosby, Texas her day was beautiful. Her florist was also amazing as she filled mason jars and old bottles with blue and yellow wildflower arrangements.

My personal projects included flower girl wands, flower girl headbands, bridesmaids hair pins and a guarder. I used left over scraps of fabric and burlap to assemble the country chic embellishments. 


These were the flower girl accessories. The yellow flower in the center was made from silk satin circles that were burned at the edges, causing them to curl inward. They were then layered (6-8 layers). The back layers were circles of blue gingham cotton folded into triangles and the wand was wrapped with gray ribbon. 


The guarder design was a little bit more challenging to come up with as I have never made on before. I decided to keep the basic elements, fabric and folded triangles, but changed up the center flower. Instead of petals, I twisted and wrapped the silk satin into a rosette, placing a single pearl in the middle. Although it looks like a success, I learned a valuable lesson!!! Word to the wise: cut the elastic shorter than you think!!! 

During the first dance, the guarder unceremoniously slid down Cass' leg!! Yikes!! She however, gracefully stepped out of it and continued her first country two-step with her husband! HAHA! (She was beet red, haha) Craig and Cass' boots were no the only ones scootin' either. They managed not only to bring Texas Country to Indiana through music, but also through the boot beer steins at the bar. Needless to say, it was one of the best weddings I have been a part of!! 


Monday, February 4, 2013

Weight-a-Minute...That's cool!

My most recent antiquing adventure found me face to face with two treasures I resisted once, but could not the second time around as they were staring me down. I'm a sucker for white and red/aqua mixed, so these beauties were calling my name. They were in great condition and reduced price! These scales add the perfect touch to both my living room and my kitchen. Below, I have featured the white one with my basic glass and metal canisters and hand-me-down salt/pepper shakers. If you are ever in Denham Springs, you should check out the shops. They are great!!


Sunday, January 27, 2013

Christmas Whimsy

So, I got a little carried away when decorating my apartment for Christmas this year. Flocks of feathers and pastels seemed to be my theme for my 4.5 ft tree with yellow, purple, pink, blue, and green. Decorating the tree, required two DIY projects and some handmade felt ornaments.


The topper was the icing on the cake. No Santa or Angel would do for this crafter. Instead, I found a twig wreath at Hobby Lobby and wrapped it with berries and pink flowers for a pop with a white bird stretched across. Total cost = less than 10 dollars! 


My cuckoo clock collection was easily transformed to fit the season with a mini pennant banner held by two feathered friends. 


These clocks are my favorite vintage finds from 2012! These varied in price from $15 to $30 and were found in antique stores as well as auctions. My favorite is the mini blue clock. Thanks to my dad, paint, and wood glue, the clock went from about 5-7 pieces to the focal point of the collection.